Crafting with Kids: Sequined Snowglobe Ornaments
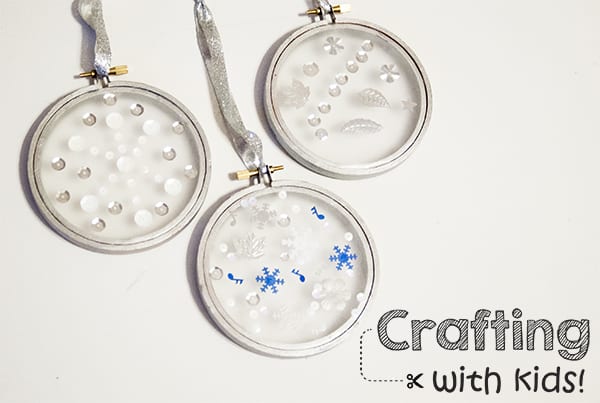
It’s that time of year – twinkle lights, tinsel and shiny glass ornaments add a layer of sparkle to anything and everything in our holiday-ready homes. A die-hard crafter, I embrace the use glitter with the bravest of them – but here is a slightly less messy way to bring the sparkle to your kids’ craft sessions this month… make this sequined snowglobe ornament together!
Whether your kiddo sticks to white sequins for a snowflake design, uses a blue and purple color scheme a la Frozen, or opts for all the colors available in the “assorted sequins” bag, the finished product is sure to impress. When they’re finished, suspend the finished “snowglobes” in a window to catch glints of sunlight, or hang them among the glowing lights of your Christmas tree.
What you need for one ornament:
- 4” wooden embroidery hoop
- Two 6” squares of contact paper (clear adhesive shelf liner)
- Assorted sequins
- Silver paint
- Paint brush
- Scissors
- Ribbon for hanging
How to make your Snowglobe Ornament:
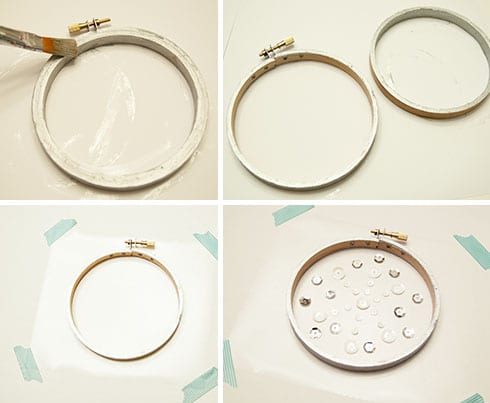
Leave the embroidery hoop assembled and let your child paint all of the edges, outside and inner rims of the hoop. Once finished, loosen the top screw and separate the hoops. Lay on scrap paper to let dry.
Remove the paper backing from one 6” square of contact paper and place on your work surface with the sticky side facing up. (For young children you may want to tape down the corners with low-tack tape to keep the contact paper from moving around while they decorate it.)
Place the outer hoop on top of the contact paper, framing the area to be decorated. Let your child stick sequins to the contact paper inside the hoop as they please – it can be random, or they can create a design.

When they are finished, remove the hoop and set it aside. Peel the paper backing away from the second sheet of contact paper and adhere it to the sequined sheet, sticky sides together, encasing the sequins. (Contact paper is fairly forgiving! If you accidentally create a wrinkle in the paper, just carefully peel it back and re-apply.)
You will now assemble the embroidery hoop, framing the sequined contact paper. To do this, place the inner hoop flat on your work surface. Place the sequined contact paper on top, centering the sequined part over the hoop. Place the outer hoop over the top and push down, hooping the contact paper. (This part takes a little maneuvering – don’t be gentle, just push down!)
Tighten the screw on the hoop and trim away the excess contact paper from the backside. Thread a ribbon through the screw top for hanging and enjoy!

Advertisement