
Tissue Paper Candle Holders
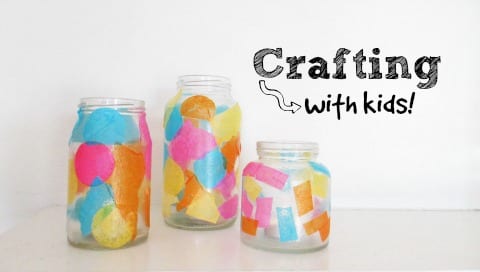
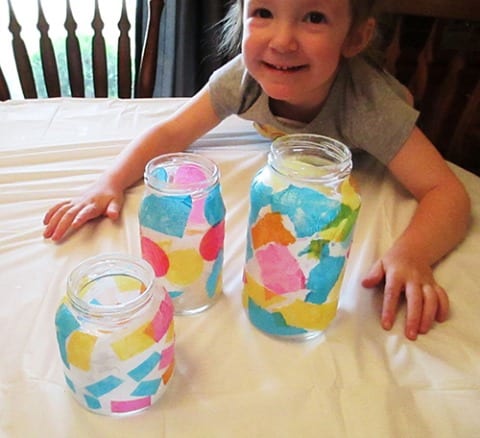
Nothing makes my little girl more proud of herself than when her daddy and I display her creations on our mantel for all to see. This easy project is an inexpensive, colorful way to bring handmade flair to your springtime décor. Used food jars work great as a base, and you can raid your giftwrapping supplies for tissue paper, or pick up a small package of multicolored sheets from the store. You don’t need much – a single jar uses very little tissue. And while Mod Podge is inexpensive and perfect for decoupage (find it with the glue in the craft store), white glue that dries clear will also work.

Younger kids may need you to hold the jar for them and help them along – at least at first. After the first jar, my daughter insisted that I step aside and let her do it herself! That’s what makes this project great for all ages; little ones can tear the tissue and use a foam brush, while older children will have fun cutting out their own creative shapes and doing it all themselves. Mom can even get in on the fun and make one herself – I did, but honestly, I like hers better!
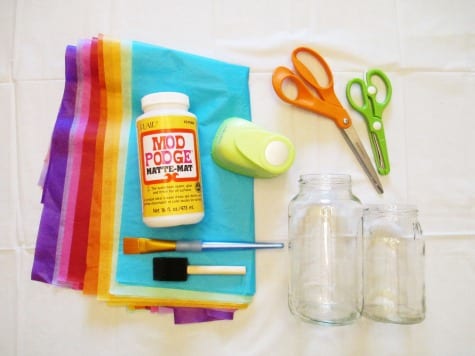
What you need:
- Clean glass jars
- Colored tissue paper
- Mod Podge
- Foam or regular paintbrush
- Scissors
- Paper punches (optional)
General instructions:
Let your child select a few colors of tissue paper; 3 or 4 works well. Cut away smaller rectangles about 6-8 inches) from the big sheets to make it easier for them to handle.
- Let your child tear the tissue into small pieces and make a pile. Pieces should not be too tiny, but not so big that they will be difficult to decoupage easily. You can also cut the tissue into small shapes, or try punching out shapes using paper punches!
 (Note that larger punches with simple shapes will work much better on tissue paper than smaller or more intricate punches, which are more likely to tear the tissue and get stuck. It’s also wise to only punch one or two sheets at a time, and little hands may need help operating the punch.)
 - Pour a small amount of Mod Podge onto a disposable plate. Let your child “paint” the Mod Podge onto one side of the jar, then begin sticking their pieces of tissue paper onto the “glue.” Help them press down the edges of the tissue pieces to adhere if needed, then have them paint over the top of the tissue once they are in place. (Some children may need help brushing over the top of their tissue, as a heavy hand will tear the tissue, or to contain excess Mod Podge. Just brush it over the top to spread it out; it will dry clear!
 (Note that larger punches with simple shapes will work much better on tissue paper than smaller or more intricate punches, which are more likely to tear the tissue and get stuck. It’s also wise to only punch one or two sheets at a time, and little hands may need help operating the punch.)
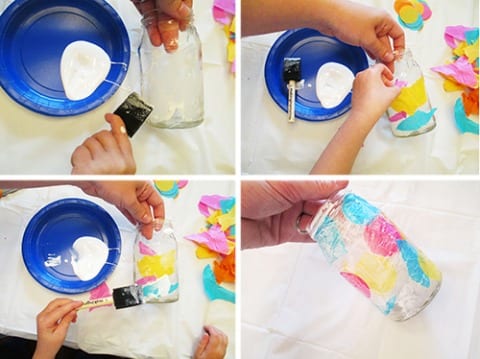
- Continue working around the jar until complete, painting on Mod Podge, adhering tissue paper shapes, and painting Mod Podge on top once more.
- Set jars in a safe place to dry for a few hours.
- Fill with a tea light candle, place in a safe place and light up your child’s creation – they will love seeing the flickering flame light up behind their colorful jars!

Advertisement