How to Freeze Your Greens

This article is a guide to how I freeze vegetables from my garden. You can use this method with either store bought veggies, or those picked in your garden. I’d like to state that I have been doing this for more than 20 years and no one has ever gotten sick. With that said, here is the USDA guide to freezing veggies, if you want more information.

While you are prepping your beans, you are going to want to get either a slotted spoon or spider skimmer and a pot of water. (I don’t have a lot of fancy tools in my kitchen, so your favorite long handled slotted spoon will work just fine.) You need to get your water to boil rapidly before you put your veggies in.
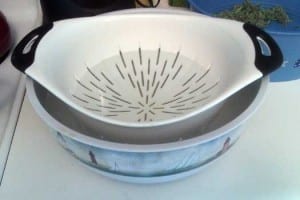
You also need to get your cold water station set up. It is best if you can add ice to the water, but since I don’t have an ice maker, I will show you how I deal with that small issue. You are going to need a colander and a big bowl. The bowl needs to be filled with cold water and ice (if you have it). Here is what my set-up looks like:

You need to have enough water in your bowl so that the veggies you are taking out of the boiling water will be submersed in the cold water.

Once this green color occurs, you need to get them out of the hot water and immediately into the cold ice water. You are wanting to stop the cooking process as quickly as you can. So let’s say, for example, your ice maker doesn’t work, and you don’t have any ice cube trays. I have this exact problem. So when I pull them out of the hot water, I put them in the bowl/colander with just cold tap water.
After all the green beans are out of the hot water, I pull the colander out of the cold water, and place the veggies in a clean kitchen towel. Then I wrap the towel up and place it in the freezer. Again, I do this because I want to stop the cooking process and get the veggies as cold as possible quickly. If you are doing small batches like I am at the moment, this isn’t going to hurt your freezer. If you are going to be doing huge batches, invest in some ice.

You only need to leave them in the cold water or the freezer for a few minutes, until the green beans are cold enough to handle with your hands. Take your veggies out of the freezer or the cold water bath, and place them on a clean dry towel. I like to let mine dry out for a little bit before I place them in the ziplock. I only mark my bags with the year and what is in them.
TIP: Mark your bag, or in the winter you are going to say, “Are these green beans, green peppers, broccoli or spinach?” Trust me on this!

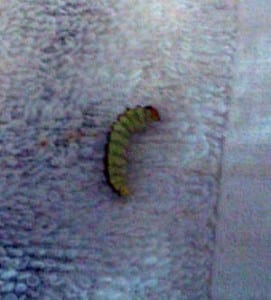
If they are on your broccoli, you will find them floating to the surface in the boiling water. They are harmless (except to your garden), and actually turn into pretty white butterflies. Just be on the look out for them when you are pulling your broccoli out.
If you want to have individually frozen veggies so that they aren’t all stuck together, you will want to place each veggie on a cookie sheet. Put them on a level surface in your freezer for a few hours. Once they begin to freeze, you can put them in a freezer bag. I don’t mind a big block of veggies. I just bang it on the counter to break it up a bit and then cook them.

Now, get out there in your garden, pick some veggies and DO try this at home! Good luck and let me know how it turns out.


