Onions, Carrots, and Corn Oh My!

I recently picked a bit of my onions and carrots. So I thought I would share what I do with all that bounty. I have the hardest time with onions, so this year I got pearl onions and discovered they work great in soups!
Pearl Onions

Now let me state, these are not going to be onions you can just eat as they get mushy once frozen. You will want to use these in casseroles, or to saute, or as a topping to pizza. I usually put them in a quart bag, and just hit the bag a few times on the counter to break of a chunk to add to whatever I am using them in. Grace is not my middle name! You can try this same trick with peppers.
There is a way to take onions and put them up whole and keep them in a dry dark cabinet or closet. My parents used to do this all the time. I remember the garage having tons of onions hanging on the walls. They were kept in nylons. But I am way too young to remember everything about it. Maybe I’ll do some research on it.

Carrots
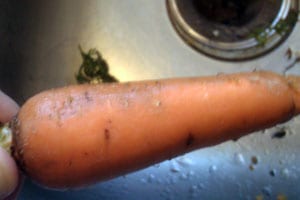
You have to remember that carrots coming from your garden have a very delicate peel. So no need to attack the carrot with a potato peeler. I just use a sharp knife and run it along the carrot in a scraping motion and the peel will come off. You don’t even have to remove the peel if you don’t want too. My kids prefer the look of the carrot without the peel, so scraping I go. I have a picture here to try to show you the difference between the part that has been scraped and the part that is left. After you scrape the peels off, you just cut off the top and the bottom and slice. I put them into a pan of boiling water just until they turn bright orange, and then into a water bath. Again, if you want them not to stick to each other, let them dry and then place them on a cookie sheet individually for 30 minute or until they start to freeze slightly. Then put them into a freezer bag and toss into the freezer. If you don’t care (which I don’t), just let them dry a bit and then place them into a freezer bag and toss them into the freezer.
Corn

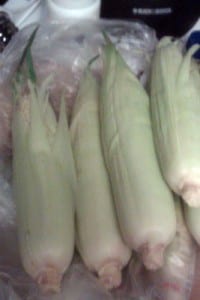
You can also make cut corn which of course, takes a bit more work. You need to remove the husk from the corn cob and try to remove the corn silk. You might find a new toothbrush might help in removing the stubborn corn silk that gets stuck in between the corn kernels. Put them into a stock pot and bring it up to a boil. Since corn floats, you will need to agitate the corn to make sure they all get a bit of cooking time. You don’t need to cook the corn all the way, but maybe 5 minutes or so, again I always go by color. When the corn turns a pretty yellow or bright white, it is time to remove the corn. I take the corn out individually and place them into a colander because I am going to take the water and dump it on my compost pile. Let the corn cool, as when you start cutting the cob itself might be hot and you need to be able to handle the cob.
Hold the corn at the tip and start with your knife and gently remove the corn kernels. You will get corn planks; I don’t know if that is the official term for the sections of corn that falls, but that is what I have always called them. Keep doing that as you rotate the corn always going from top to bottom. Once you remove all the corn, place the corn cob aside and scoop all the corn into a bowl and start again with another corn cob. Once you get all your loose corn and corn planks into the bowl, you can place the corn into freezer bags and toss into the freezer. My kids don’t like the corn planks. (I don’t know why it makes a difference but it does, so here is how to get rid of them.) You can run your fingers through the corn and gently break up those planks. I have my kids help me with this and the planks normally just fall apart by running your hands through the corn. After you have the corn to your liking, you can put them in freezer bags and toss into the freezer.
I’ve been writing about the vegetables coming out of my garden but if there is a veggie in your garden or CSA box that you don’t know what to do with please leave a comment. I’ll share what I know or do some research and share what I find out!


